Showing posts with label DIY. Show all posts

Saturday, August 22, 2015

So I Made A Quilt.

I am not a quilter. Nor am I necessarily a sewer. I'm a find-a-project-and-doer. I just decide I'm going to do something and then spend some time convincing myself I totally know what I'm doing. Sometimes I may stop and take an extended break along the way due to fears of what's next, but I always find a way to finish. Call it whatever you like, it's probably mostly crazy.

Last winter, I saw an idea for a baby onesie quilt on a super beautiful blog. And I was all like, "wow that is so cool. I think I could totally do that. I kind of know how to sew." So the idea spun around in my head for the better part of six months. I just couldn't let the idea go no matter how much it intimidated me. I procrastinated when we found out we were pregnant again to wait until I found out the sex. That way I'd know what onesies to use and what to save.

In hindsight, it really didn't matter if baby #2 was a boy or a girl. This project was truly a walk through a boxed up time capsule. The bottom line is, there were a lot of outfits that Adly wore that would always remind me of, well, Adly. And I wouldn't necessarily ever put them on her future little sister. Some blatantly had her name on them, others were just special from an experience we had or pictures I took that I now treasure from various moments in time. 

I wanted to share the tutorial I followed and my experience of making my first quilt. However, I also really wanted to encourage other moms to try it. While it was labor intensive and took a few months to complete (because my only work times are 2-3 hours during nap), I think it was so worth it. And totally doable for beginner sewers! You just need to know how to sew a straight line (or make it look straight). I can't begin to say what a special keepsake it turned out to be. The outfits included in the quilt likely would've always remained boxed up for I don't even know what. Now Adly will have them out in her room and anytime the moment strikes we can walk down memory lane talking about each square.

The first step for me was picking out the clothes I wanted to use. Like I said, it's a literal walk through a time capsule. I loved looking through and reminiscing about the days when Adly was itty bitty and the cutest clothes she had. The blogger from the tutorial had suggested I'd need a lot of onesies, and she was so right. First I pulled out all the ones with Adly's name on it, obviously those wouldn't be reworn. Then I pulled my personal favorites. Next I pulled some I thought were just cute or reminded me of a certain memory. Lastly, I went for soft fabrics that would be comfy to snuggle with. I used outfits ranging from 0-3 months, up to 18 months. Some weren't onesies but super cute outfits I just couldn't see on our next daughter because they reminded me too much of Adly. And, I'll admit, the frugal side of me pulled a few specifically because I knew the seasons would be off and little Ellie would never be able wear it.

I was honestly most surprised by how easily a color scheme came together. The author of the tutorial had found this in her case too, but I seriously thought that was just a coincidence for her. In order to keep with my theme, I did have to put back a few I really wanted, like her first Thanksgiving and first Christmas outfits. The orange and red just didn't fit with the other colors I had going.

Here is the list of materials you will need, once you have your pile of 50-60 onesises (See! You need a LOT). I ended up making a quilt that was 7 squares by 7 squares, so I used 49 in the end.

Onesie Quilt Materials List:
-Pile of 50-70 outifits (the size of quilt you decide to make will determine this).
-cutting mat
-5.5"x 5.5" square guide for cutting squares (I used cardboard measured from a box I had)
-rotary cutter
-Pellon 911FF (backing for onesies to make them stiff. I tried both kinds she suggests, and this was my favorite to work with as a beginner).
-Batting. I used Pellon Natural batting. Make sure it is thin enough to be used in a home sewing machine. Also, I would honestly buy this by the yard. I bought the bag and it was WAY too much. 
-Post-Its (for labeling your piles and rows)
-Spray Baster
-Painters tape
-Bias tape or Binding fabric. (I googled how to do this and used binding fabric. There are excellent YouTube videos out there showing how to do both.)
 
Let me warn you, the first cut is seriously the deepest. I may or may not have shed a tear when I cut into the first little teeny onesie. Just remember you would've just left them in a box otherwise. Although, cutting into the onesies does mean you have to follow through and finish the project. Motivation at it's finest! Another tip I have is that if it is big enough, and it's an outfit or pattern you really love, cut a few squares from the piece. Adly had a sleep sack that was so soft, and had her name embroidered on it. She wore it for months on end, but it was still in great condition. I was able to cut three squares from the sleep sack and they are all in the quilt.

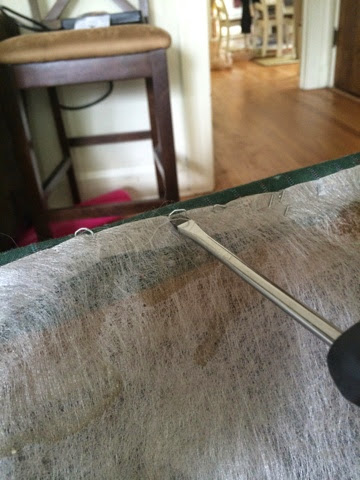
Finally, the last part, the binding of the quilt was definitely the worst because I had to do it by hand. I looked for ways to do it by machine, but by hand seems to be the way of the road. So be prepared to spend some nights on the couch sewing like you're Betty Ross, only by the dim light of the TV and a lamp. This is actually the perfect project for a boring pregnant lady. Besides all that intensive labor, that's true love, right?!

I'll leave you there. The tutorial comes from the blog, Coconut Robot and she honestly does an excellent job explaining how to put the quilt together, especially for beginners. Click on the link to go to her tutorial.

Again, I seriously recommend trying this if you have a sewing machine, a little guts, and sentimentality. Even if it's not the most amazing, perfect quilt, it will have all the meaning in the world to your little dear one day. Maybe even more so to you. 

Lay out your squares and play around with different placements. I left this, walked away and came back a few times to ensure I liked it. 
First three rows sewn together. 

All rows sewn, with batting and backing cut larger. 
Using painters tape to sew the lines to sandwich the quilt was a genius tip!
Back of the quilt with lines sewn in.
Finished quilt waiting for hand sewn binding. It waited a few weeks. 

Close up of binding. I chose to use the same fabric from the back because I really liked it. Many people use a different style of fabric.

Finished quilt!

Monday, October 13, 2014

That time I reupholstered a chair.

So, do you ever have those moments when you think of a project and you're all like, "Pssshhhh. Oh yeah...I could totally do that myself. No prob." And then you go and get everything to do said project and then you step back and think again and you're like, "Oh s$*t. I don't know what I'm doing." But then you're too stubborn to admit you're a dumbass for thinking you could ever do a project that big and so you keep moving forward anyways?

I sure hope I'm not the only one out there. 

Anyways, that was how I found myself four months ago, sitting in front of a chair my husband has had for years and always wanted to recover. It was a week before Father's Day and I had the best surprise ever! I was going to reupholster his chair. A gift! Such a thoughtful gift at that. He'd never guess it, and would be over the moon when he saw his fancy new chair.

Two days later, as I found myself starting to dig my way through the project and in the middle of re-upholstering hell, I had to tell him about my project, because, well, who seriously thinks they can recover a chair in a few days?!?!

I did.

So when I told him he was all super excited and thought it would be awesome and I was sitting there kicking myself in the face for stupidly thinking I could actually do something like this when I had never done anything remotely close to dealing with fabric.

Then Father's Day came and went. Then summer came and went. Then I went back to work. The fall came. Then came Adam's birthday. Finally, our two year anniversary was approaching and I just knew I had to finally complete this project. So I set to it.

And would you believe...I actually finished it! Well, almost. I still have to sew the cushion cover and I'm waiting on a sewing machine to do that. But I have a feeling that will be peanuts compared to the staple-gunning, hand sewing, staple pulling, plier pulling hell I've subjected myself to over the last four months.

So after all that, if you think this is something you want to try your hand at, don't say I didn't warn you. It takes a lot of time. It takes a lot of trying, redoing, trying, sometimes redoing again and again. And the staples....the staples never end! But when all is said and done, I'd say it was worth it. Here's how I did it, in all the pics I could manage to take in between swear words and pained fingertips.

And I have to say, it turned out pretty awesome! So, hey. Yeah, now I'm totally a chair reupholsterer.
The chair. Before.
 Just the beginning. When I was young and naive. 
You need pliers, a flathead screwdriver, a bucket for the discarded staples and whole lot of patience. 
Starting at the bottom of the chair, peel away, layer by layer. Like an onion. 
This is back when I thought there were SO many staples. There were thousands more to go. 
Peeling away the back. 
These metal teeth were frightening to put back on. But they work so well, after they tore up my fingers. 

Once all of the fabric is off, lay the pieces out over the new fabric to cut. 

Use only fabric scissors! Adam's aunt KK got me these to help me out. For a wingback chair, I used 5 yards of fabric. If I had to do it again, I'd cut with a little extra room on the new fabric. Some pieces were pretty tight putting back on. 

Once all of the fabric is off, have a drink (or ten) and begin stapling on the new fabric piece by piece.
You will also need some random fabric to put underneath the cushion area. I didn't forsee this, so I used a piece of fabric I had laying around, hence the clashing green fabric. 


Admiring the piping. 

Ahh, the wingbacks. These were the biggest bitches of all, if you ask me. I swear I stapled, pulled, swore, stapled and hammered the damn things together at minimum eight times. Now, this might be my own fault from not following directions and/or waiting three months before putting them back together, but thats besides the point. By the final time I did it, I had them down and thankfully, I'm quite happy with them.

Before I did the backside, I learned from the wingback debacle and only had to redo it three times.

The (almost) finished project. 

While there are certainly little things I can see that still need fixing, I don't think a blind eye would notice most of them. In the end, I'm quite proud of the project and am happy I stuck with it. Who knew? I know how to work a chair. 

Friday, December 20, 2013

First Time Foods

We've hit the point in time where we make the shift from oatmeal cereal to regular pureed "solid" foods. This is BIG.

From the time I was pregnant, I had decided I was going to make baby food for Adly, for as long as I could stand it. I took the approach of, "if it works and is easy, great. If not, that's ok too." I didn't want too much pressure on myself to make all of it. I don't have strong opinions either way of whether you make your own food or not. For me, it's just something I wanted to try.

I have to say it's waaaaay easier than I ever thought it would be. The hardest part of starting solids for me has been how and when and how much to feed it to Adly. Figuring out a schedule is still a work in process, but I think we're getting it.

For now, we are feeding solids 1-2x a day. In the morning and then in the afternoon. She nurses and then an hour later I give her an ounce of solids. In the afternoon I give her two ounce of solids. See below to find out what is an "ounce". From what I've heard, once she hits six months is when she will begin to "rely" on the puree as a meal so we will likely be adding in more at that time.

To make your own baby food, all you need is a steamer basket, a big pot, an ice cube tray, quart/gallon size ziploc bags and veggies/fruits of your choosing. So simple!

For Adly's first food, I chose sweet potato. This was mostly because it was what I had already bought from the store. Doctors are now saying you don't have to go by the old standby of "veggies first, then fruit". My doc in particular was also very encouraging of using spices that I normally use so that Adly adapts to our style of eating early on. Therefore, I got a little crazy and even added some cinnamon to the sweet potato puree. Thrilling stuff, I know.

When it comes to loosening up the puree in order to make it easier for them to eat, you can use breast milk, formula or the cooking water. For the sweet potato puree, since I didn't steam it and didn't have any liquid, I chose to use breast milk. However, BM is liquid gold, so anytime I steam foods, I'll be using the cooking water as the liquid.

Once you've created your puree, you can keep it covered in the fridge for up to 3 days. Most veggies/fruits will give you more than 3 days worth, so you'll want to store it in the freezer. For this part, you pour the puree into the freezer tray. Each individual cube is 1 ounce. Isn't that easy? Cover the tray with plastic wrap and freeze. Once frozen, run the back of the tray under hot water to loosen the cubes. Place the cubes into a dated and labeled Ziploc bag. Every night, take out cubes for the next day's meals and place in a covered tupperware for serving. They unthaw overnight and are ready to eat!

Adly seemed to really enjoy the sweet potato. Unfortunately, my phone decided it was full the moment we began recording her first eating experience. Technology!! But I did capture some of it.


Pureed Sweet Potato:
1-2 medium organic sweet potatoes
Baking sheet
Food processor
Breast milk/formula/water

Using a fork, poke a bunch of holes into the potato. Place on a baking sheet and roast at 400 degrees for 45-60 minutes, until soft. Pull out of the oven and let cool. Once cooled, cut open and spoon out the sweet potato into the food processor or blender. Add in your liquid (can be breast milk, formula, or water), little by little and blend. Keep adding liquid until the puree has reached a consistency you feel your baby can handle. (I went by the consistency of the oatmeal cereal we've been feeding). Add in a dash of cinnamon, if you feel a little crazy and then serve to baby. Don't forget the bib!

All ready to eat
Before: excited baby!
After: happy baby!

Saturday, December 14, 2013

DIY Xmas Photo Shoot

I absolutely love to DIY just about anything and love the process of finding out how to create things on my own. However, I'm really not that good at it. I have a short attention span and no patience, so I like to complete projects quickly, usually skipping over important details. Clearly, I don't naturally possess the tools to be a good crafter/DIYer.

This holiday season, I excitedly set out to do a little Christmas photo shoot for Adly via some photography "how to's" I found on Pinterest. Per usual, I didn't pay much attention to detail and just wanted to get it done so I could see the final results. The goal was to have Adam there to help out, but alas, he wasn't around on the day, during the hours I just had to have it done. I'll admit, I have a problem.

Per the tutorial, I used a white sheet we already have here at home and laid it out on top of the bed. I then strung white xmas lights all around our headboard. I had picked up some cute little Christmas decorations to use a props that I found in the trusty Target $1 section (yet, why is it every time I enter that store I cannot leave with spending less than $50!?!).

I put Adly in a red headband and a pair of white bloomers. I would've loved to have had her in some cute baby leg warmers, but again...the patience. The headband and bloomers were items that I had at home.

Anyways, once the background and my model were set up, I started shooting. Here's another place where I didn't/wouldn't take the time to follow instructions. I'm not a photographer, but I have a fancy camera. That doesn't mean you'll still take great pictures. The lighting was terrible in all of the pictures, so all of them required editing. Next time, I'd make sure we are in a well-lit area and maybe, just maybe, I'll actually read up on how to use my fancy camera properly beforehand.

Thankfully, because there must be other impatient, wannabe photographers out there, there are fantastic photo editing websites. My favorite has become Pic Monkey. It's like a user friendly version of photoshop for dummies, and it's free! Because of this website, my impromptu, un-thought-out photo shoot was saved.

I attempted to make this a "how to" post...but clearly it's become more of a "what not to do". Either way, even if you only own an iPhone, I suggest trying out taking pictures of your little one. Why not? You really can't go wrong, now that you've read all the ways you can!


Happy Holidays!! From our crazy family to yours....

Tuesday, May 28, 2013

Nursery

The nursery has been a work in progress for many months. I certainly continued my wedding craziness craftiness and tried to do as many things as possible handmade. The color scheme we decided from early on would be browns and sage green. Those are colors we both like and back then thought we wouldn't know the gender. Since we rent, we weren't going to paint the walls so the color had to come from the room.

Over time though, our color scheme has changed quite a bit, especially since we found out we are having a girl. People keep asking me our color scheme, and the best way I can explain it is sage green, browns, purples, yellow and then a whole lot of other colors. We probably went a little overboard on the colors, but we love it and honestly, will she care? No. As long as she has a boob available to keep her full and loving arms to keep her warm and safe.

Any of you who know me know how I feel about my plans and having things organized. It has been agonizing for me to wait this long in order to have it finished. Of course, we're still 7 weeks out, but now I can breathe easy. We absolutely love how it turned out and cannot wait until she is here to enjoy it.

Dresser:


Once we found out she was a girl, we started looking for a pop of color to add to the room. That's when I saw inspiration at a ridiculously overpriced furniture store. They had this beautiful deep purple dresser that I loved. Thankfully my husband agreed with my vision and that is how I set about refinishing the $30 thrift store find of a dresser in dark purple. Along the way, we realized it was also the same color we had in our wedding. Fate. We purchased the adorable flower drawer pulls from World Market for a low $3.99 a piece. Love.
On top of the dresser is going to go a gasp! new TV. This was a recommendation from a few new parents we know. I know what you're thinking. A TV!?! In a nursery!?! Awful, awful parents! In fact, it's a genius idea. It will be there to entertain Adam and I through middle of the night feedings where our little dear refuses to sleep.


Rug:
Then there is the rug. Ugh. The rug. You all know about that. Not much to say other than, it's a rug. And I painstakingly made it over three months. I do, however, like how it looks in the nursery.


Crib:

The crib came from Adly's grandpa Dan. We got the crib from Target and it is the Graco Lauren style. A steal for the look and high safety ratings of the crib. So far, we've been very happy with it.


Crib Skirt:
The crib skirt was sewn by cousin Emily, who has done so much to help get this room done. (Enjoy it Em, this is the only compliment I'll give you in public). She and I painstakingly cut the fabric, sewed the ruffles and put it all together to cover up all the storage I've needed under the crib.


Changing Table:
The changing table was the start of us adding sage green to the room. Adam and I found it at a little furniture shop near our house and fell in love with it. I think it's such a unique, beautiful piece. It also has a ton of storage for goodies underneath like diapers and wipes.


Rocker/Glider:
For this, like so many other items for our nursery, we found thanks to a recommendation from our new parent friends Laura and Reggie. The rocker was something Adam wanted a big say in. It needed to be big enough for him and comfortable for both of us. Reggie highly recommended theirs and it even reclined. We thank you guys for yet another fabulous recommendation!


Door Hangers:
I purchased these green heart shaped hooks from World Market. That place is awesome. For now, they're being used as her towel holder and adorable hat holders. The hat in the middle is a knitted boob hat. Our friends Dan and Lisa betrothed that beauty onto us. Of course, I can't wait to adorn her beautiful head with it....at least long enough to take pictures to save for blackmail when she's a crazy teenager. 


Monkey:
I fell in love with this sock monkey at an antique store while Adam and I were out browsing one day. For whatever reason, I immediately pictured our future child toddling around, dragging the monkey behind it. Adam shot me down right away, saying it was a waste of money. Sure enough, two days later I came home to find the beloved sock monkey as a gift from the sweetest husband ever.


Picture Frame Wall:

This idea came from many hours of pinning on Pinterest and finding some cute, cheap frames during my adventure at IKEA. There is a map of Michigan and a map of Illinois so Adly always knows where her roots are from. I saw this idea on Martha Stewart where she had actually sewn hearts, but I'm not that talented. There is a picture of her ultrasound (the one where she's totally ready to box whoever woke her up). A wedding picture of us, flowers from the big day, and then empty frames to be filled with her beautiful face once she's here.


A-Z:


Adam painted this beauty for his baby girl. Hearing him talk about this painting brings me to tears nearly every time. He is so excited to be rocking her at night, talking about the letters of the alphabet. I hope she gets some of his artistic talents when it comes to painting. Maybe, just maybe if she's lucky, she'll even be a more organized crafter than her mom.


Side Table:


I spotted this lampshade in Emily's storage closet and immediately confiscated it. I knew it would go along with some of the many colors in the nursery. The hunt for the lamp base was not so easy. After a few botched purchases, I finally headed to good ole World Market, lampshade in hand, to find the perfect base. That's where I found this beautiful little owl. Love it. 

In addition, there's another picture frame waiting to be filled with Adly's face and an iPhone speaker for music to help when it comes time for me to have to sing nursery rhymes. I make stray cats run for cover. Finally, I added drawer pulls to Adam's side table he refuses to give up from his bachelor days. At least its girlified now. The pulls also came from World Market. 


I'm incredibly in love with the way the nursery turned out. It is so very representative of Adam and I and also so unique. There are many personal touches throughout the room to wrap Adly with love every time she enters it.

A huge THANK YOU to all of you who helped to create, purchase, shop for, and donate things to fill  her nursery and make it one of a kind. She is one very lucky and loved lady.
Related Posts Plugin for WordPress, Blogger...

AddThis